Showing posts with label Table Runner. Show all posts

Tuesday, March 29, 2022

Table Runner - Vintage Fabric

My husband’s uncle passed away almost exactly a year ago and while my mother-in-law was packing up his house, she found some fabric that belonged to her mother. She gave it to me to do something with so I decided to make a table runner for her as a gift.

I was wracking my brain on how to make it all incorporate together without looking too nightmare-ish.

This was the first layout I had figured. I planned to add black squares where the blue is and put a couple black strips in too to break it up.


I didn’t love it but figured it was the only way to make it work.

THEN…

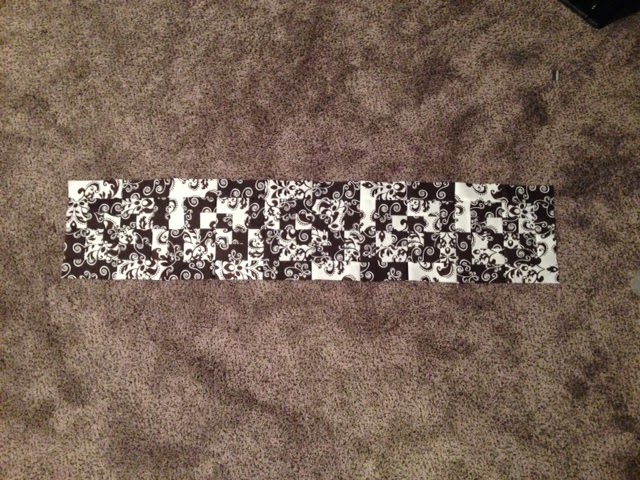
I pulled it out on a visit this weekend and my sister said it was too busy (this I already knew). Then I played around with it a bit, removing everything but the larger floral squares. I came up with this.

Then I thought I’d use the strips for the binding but my sister suggested using the strips for a backing!! 💡


I'm not quite done yet but all I have to do is sandwich together with batting, quilt it, and bind it. I hope to give it to her on Mother's Day!

Tuesday, February 9, 2016

Pin Cushion!

I've been working on catching up on my quilting. I missed one guild meeting and then went back in January but didn't show anything for Show 'N' Tell. I have a couple things to show at the meeting on Tuesday.

I made a pin cushion inspired by one I saw online using felt hexagons sewn on to a square. It was really challenging with the small pieces but I love how it turned out.
Inspiration:
My Version:

I've also completed a couple table runners. I made a Christmas Bento Box (etsy Shop) for my Mother-in-Law and I made a Christmas Bento Box for myself. They are the same pattern but they look so different.

I'm really going to try and create some paper piecing patterns. I have made a few projects using paper piecing and I find them so fun to try out. The possibilities are endless!

Stay tuned!


Friday, August 28, 2015

Bento Box Table Runner

Hey everyone!

I made something for Mother's Day for my Mother-in-Law and I think I can post it because I'm sure she doesn't read this anyway :).

I was searching for a fun and quick block to do with minimal fabric choices. I was glad when I found the Bento Box Block because it only used 2 fabrics of contrasting colours/patterns. I watched the tutorial from Fons & Porter and they make it really easy to follow. (YouTube Tutorial)

I had minimal fabric to work with so I decreased the size of my pieces (requiring a little bit of math) but I'm glad with how it turned out!
*UPDATE (August 29/15): My mother-in-law loves it and she has requested another one for Christmas!*

Materials for MY (Smaller) Bento Box Table Runner:
Fabric A: 1 fat quarter dark fabric
Fabric B: 1 fat quarter light fabric
Batting: thick batting or thermal batting for the center

Notes:
Cutting for both fabrics will be the same. What you cut for Fabric A, do the same for Fabric B.
Seam allowances for this project are 0.25"

Abbreviations:
FQ - Fat Quarter
RST - Right Sides Together

DIRECTIONS:
CUTTING:

  • Fabric A:
    • Step 1: Cut Fabric into five 2" strips (cut off the shorter side of the FQ). Your strips should be 2" x 18". You should have a larger piece left over. 
    • Step 2: Cut All your strips into the following pieces:
      • Pieces (1) two 2" x 2";
      • Pieces (2) two 2" x 3.5";
      • Pieces (3) one 2" x 5".
  • Fabric B:
    • Repeat Above Cutting Steps
PIECING:
  • Step 1: Take a Piece (1) of Fabric A (dark) and a Piece (1) of Fabric B (light), place RST and sew.
  • Step 2: Take a Piece (2) of Fabric A (dark), place RST and sew.
  • Step 3: Take a Piece (2) of Fabric B (light), place RST along the top edge and sew (see photos Below)


  • Step 4: Take a Piece (3) of Fabric B (light), place right sides together along the right edge and sew (see photo below).
  • Repeat steps 1 through 4 using the opposite colours to make the inverted blocks.

  • You will end up with 10 blocks of both dark-light-dark and light-dark-light (20 blocks total).


  • Take 2 of each block and arrange them into the larger block below. You will alternate having the colours be opposites of each other.


  • Sew the 2 top blocks together.
  • Sew the 2 bottom blocks together.
  • Sew the 2 top and the 2 bottom blocks together.
  • Continue to sew the blocks together in the same manner. ** Be sure to place them in the same order. For example: If you have a light on the top left, it should be on the top left for all 5 of the larger blocks. ** You will get 5 blocks total.


  • Sew the blocks into a line of 5 blocks.


  • I used the rest of my fabric and made the backing. I put the lighter piece in the middle and cut the darker piece in half and put one on each side of the lighter fabric. This just makes sure you have an even backing pattern.
  • Add a thick batting in the middle and quilt as desired.
  • I machine bind my quilts. I use this tutorial by Jenny at the Missouri Star Quilt Company. It is very easy to follow.


  • I attempted to do a stitch that mirrored the swirl pattern on the fabric but it didn't turn out as well as I would have liked so I changed it to a blanket stitch.


Finished Table Runner

I hope this is clear. It's hard to explain but if you watch the Fons & Porter video, it'll help.
Happy Stitching!